Business Email FAQs
How do I setup a BlackBerry to sync with Hosted Exchange?
Follow these steps required to activate your BlackBerry device for use with Standard Broadband Hosted Exchange service.
Prerequisites
- An active Hosted Exchange account with Standard Broadband
- A BlackBerry device with cellular service and data plan
- BlackBerry Enterprise Service from your carrier
- Your activation password, contact support@iasl.com to receive your password
Activation Process
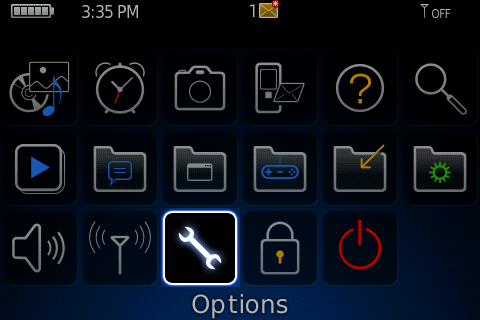
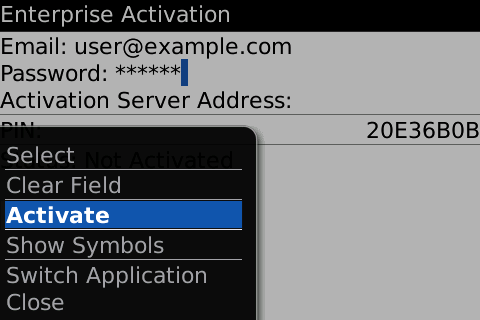
- On your desvice’s desktop select Options.
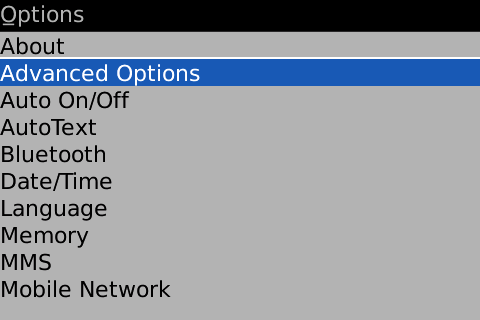
- Select Advanced Options.
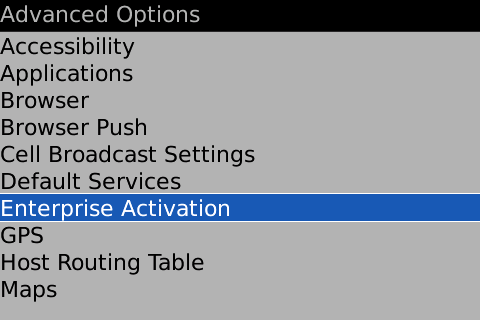
- Select Enterprise Activation
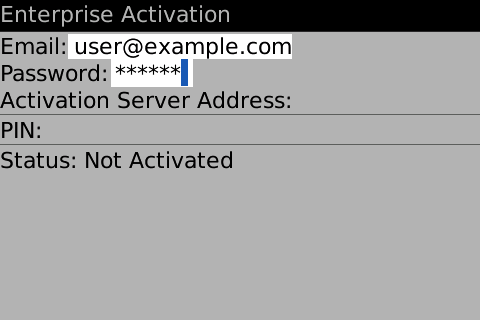
- Enter the email address and activation password provided to you by our support desk.
- Press the Menu key and select Activate.
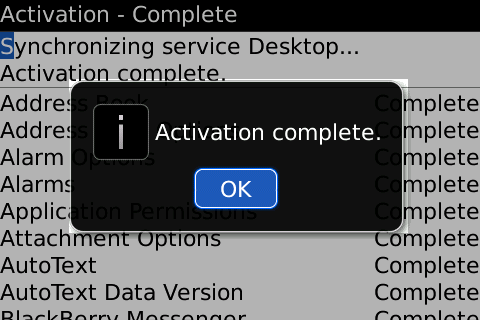
- Once the activation is complete a pop-up window will appear.
How do I setup an Android device to sync with Hosted Exchange?
Follow thee steps to activate your Hosted Exchange account on your Android device.
Prerequisites
- An active Hosted Exchange account with Standard Broadband
Activation Process:
- Go to Accounts and sync
- Press the Add Account button
- Select Microsoft Exchange ActiveSync for the account type
- Enter your email address in the provided box, as well as your account password
- In the Server box enter the server name you were provided (typically XXXXXX.dmtel.ca) and then press Next.
- Check the box for Requires SSL and then press next
- In the Give this account a name field, you may give a screen name to your account
- Enter the name you wish recipients of your emails to see in the Your name field
- Press Done.
How do I setup an iPhone/iPad to sync with Hosted Exchange?
Follow these steps to activate your Hosted Exchange account on your iPhone or iPad.
Prerequisites
- An active Hosted Exchange account with Standard Broadband
- IOS 2.1 or later on your device
Activation Process
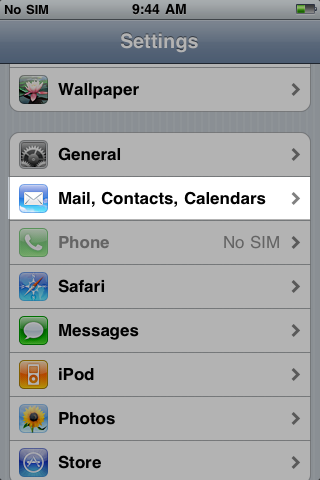
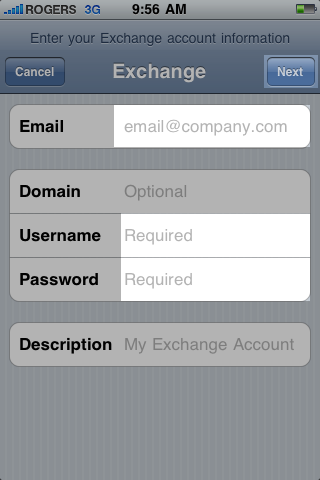
- From the home screen select Settings.

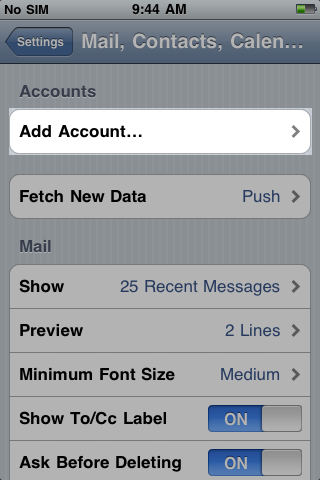
- Select Mail, Contacts, Calendars
- Select Add Account.
- Select Microsoft Exchange.

- Enter your hosted Exchange email address in the Email address field, leave the Domain field blank, enter your main email address in the Username field, your Exchange account password in the Password field and then press Next.
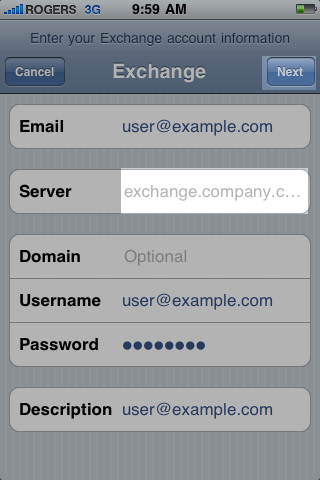
- In the Server box enter the server name you were provided (typically XXXXXX.dmtel.ca) and then press Next.
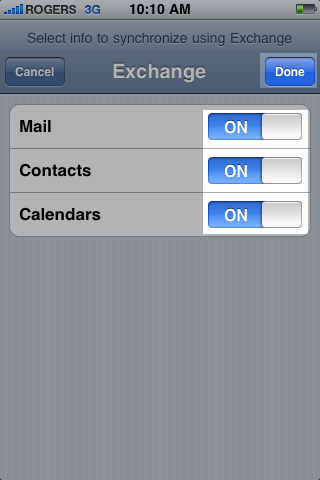
- Select the type of information you would like to sync and then press done.
How do I setup Zimbra MAPI connector with Outlook 2007?
How to setup Zimbra MAPI connector with Outlook.
This document will show you how to setup the ZCO Connector for MS Outlook.
Prerequisites
- An active Hosted Exchange account with Standard Broadband
Process
- Download the connector using one of the links below.
ZCO 32bit Connector
ZCO 64bit Connector
ZCO 32bit Connector (version 8)
ZCO 64bit Connector (version 8)
ZCO 64bit Connector (version 8.05)
ZCO 32bit Connector (version 8.05) - Once downloaded ensure that Outlook is closed on your computer and run the downloaded connector.
- Once the connector has been installed, open Outlook
- Outlook will prompt you to select a profile to use, by default it will say Zimbra (see image below). If you have existing email in outlooking use a POP or IMAP based connection and wish to keep that mail change the drop down box to the previous profile, it will be named Outlook by default. Then click on Ok.
- Outlook will open as normal at this point, now you must add the new account. Click on the Tools menu and select Account Settings, the accounts dialog window will appear.
- Click the icon labeled NEW, the account setup screen below will appear.
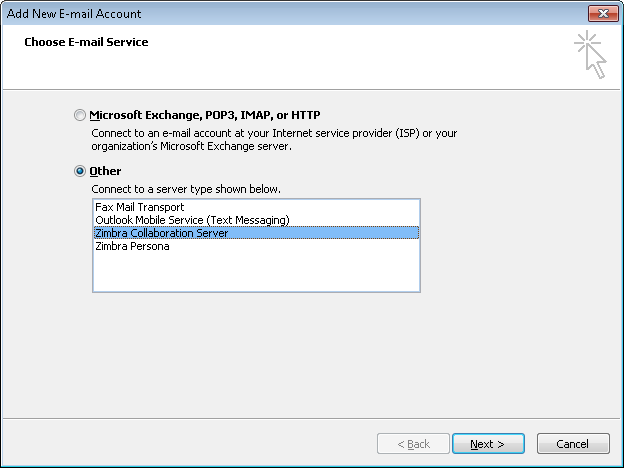
- Select Other as the type, and then select Zimbra Collaboration Server from the selection box and click Next.
- The settings box below will appear.
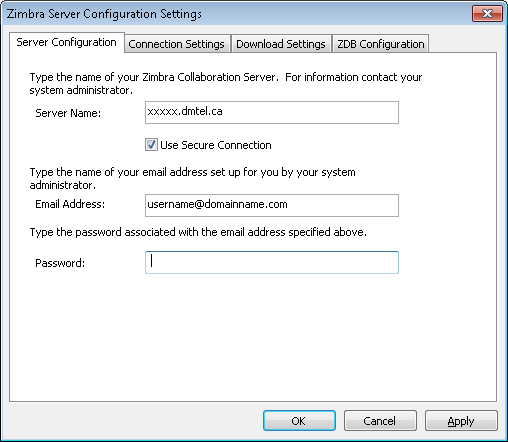
- For the server name enter the name you were provided when you signed up.
- Make sure to check off Use Secure Connection, enter your full email address in the Email Address box as well as your password in the Password Box.
- Click on OK
- Your account is now setup in Outlook and will appear on the left hand side of your screen. It will be labled as a folder list starting with Zimbra – Your Name
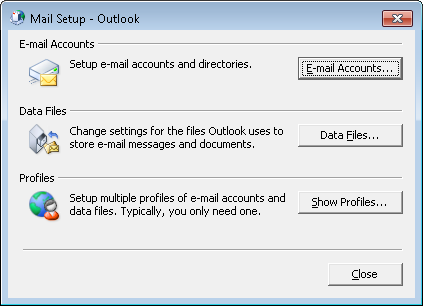
- If you exist and re-open outlook and are prompted again to select the profile to use, please select Outlook. Follow the steps below to set the profile as default.
- Open the Control Panel
- Select Mail
- The window below will appear, select the profiles button
- Change the radio button at the bottom from Prompt for profile to Always Use This Profile, and then make sure the work Outlook appears. Click on OK.
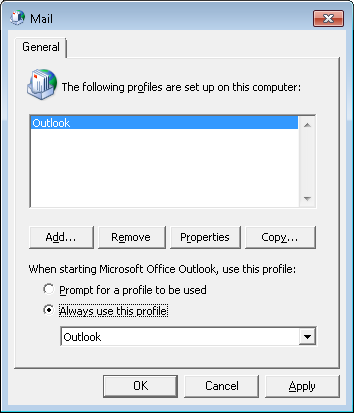
- Outlook should now open and not prompt you for a selection.